Employee development interview with your employees
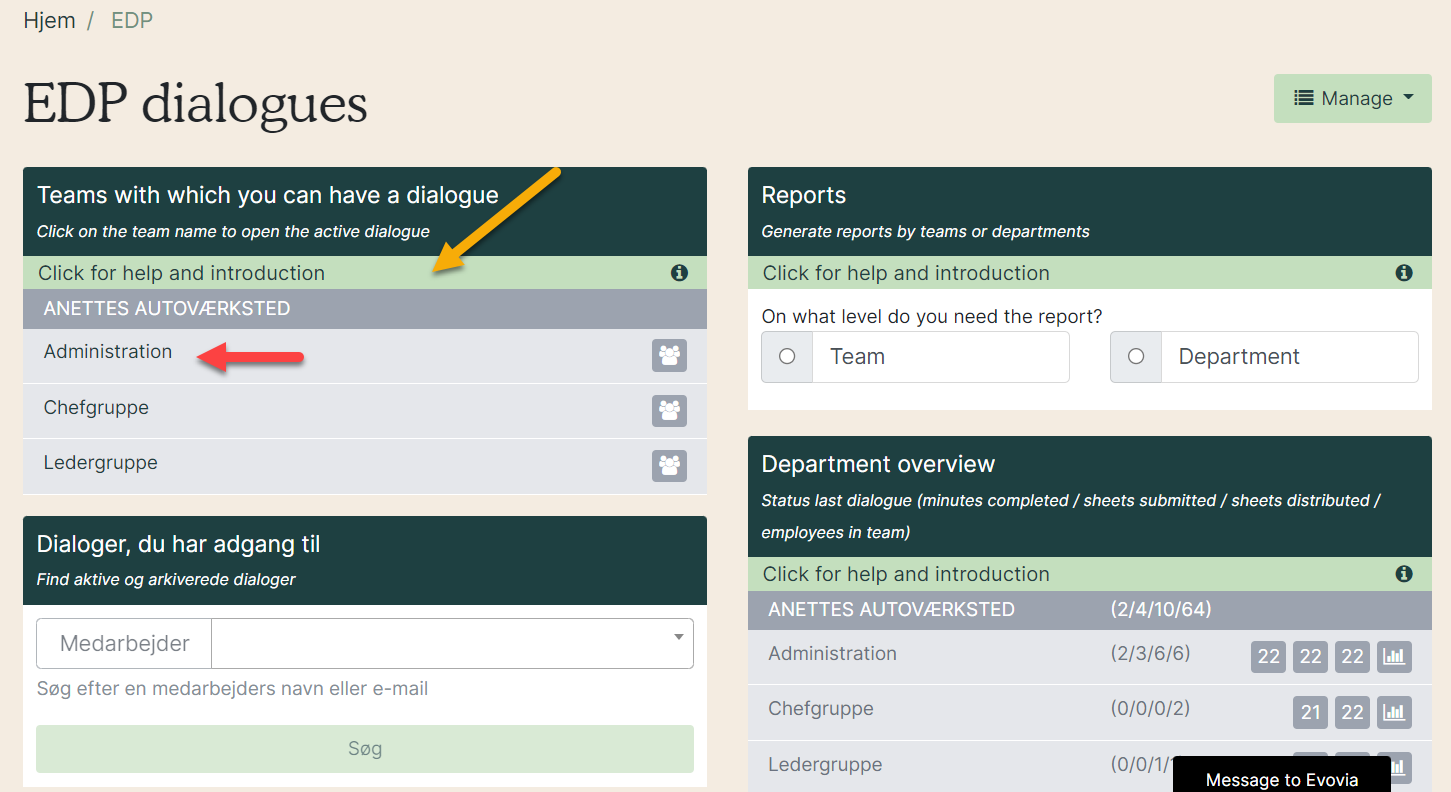
1. Go to the EDP tool and click on the team you need to have a dialogue with (red arrows). If necessary, read the help text that unfolds when you click on it (yellow arrow).
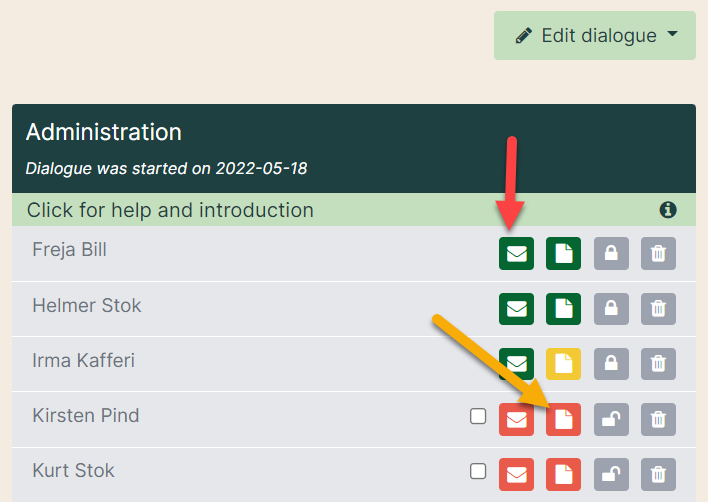
2. Select the minutes you need for the interview (yellow arrow). Your employees have sent their answers when the envelopes are green (red arrow). The completed minutes are also green, while the red ones have not yet been opened. A yellow report has been opened but not closed.
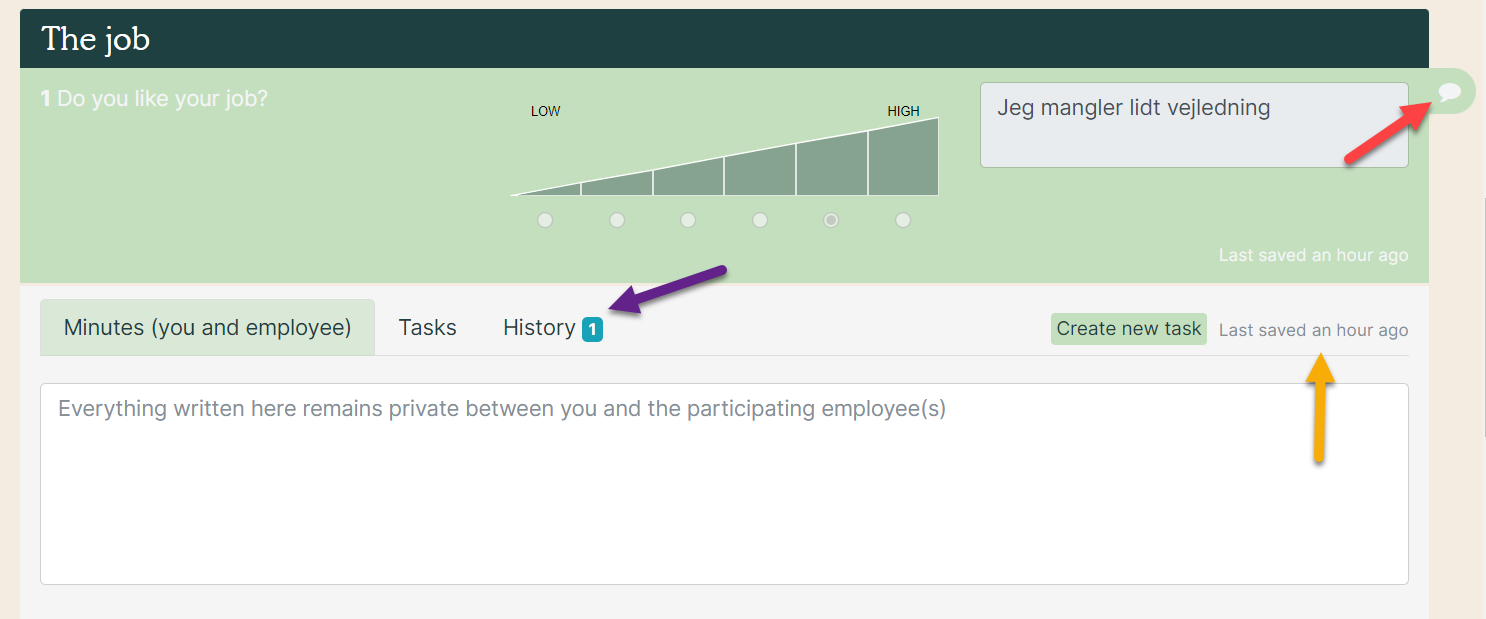
3. In the form you can see the employee's score from Low-High (0-5) and any comments.

4. To write the minutes (we recommend that you do so during the conversation with the employee), click on the speech bubble next to each question (red arrow). In the white box you write the comments. The form is automatically saved, and you can se when it was last saved (yellow arrow). If you have previously written minutes in the same form, you will find it under 'History' (purple arrow).
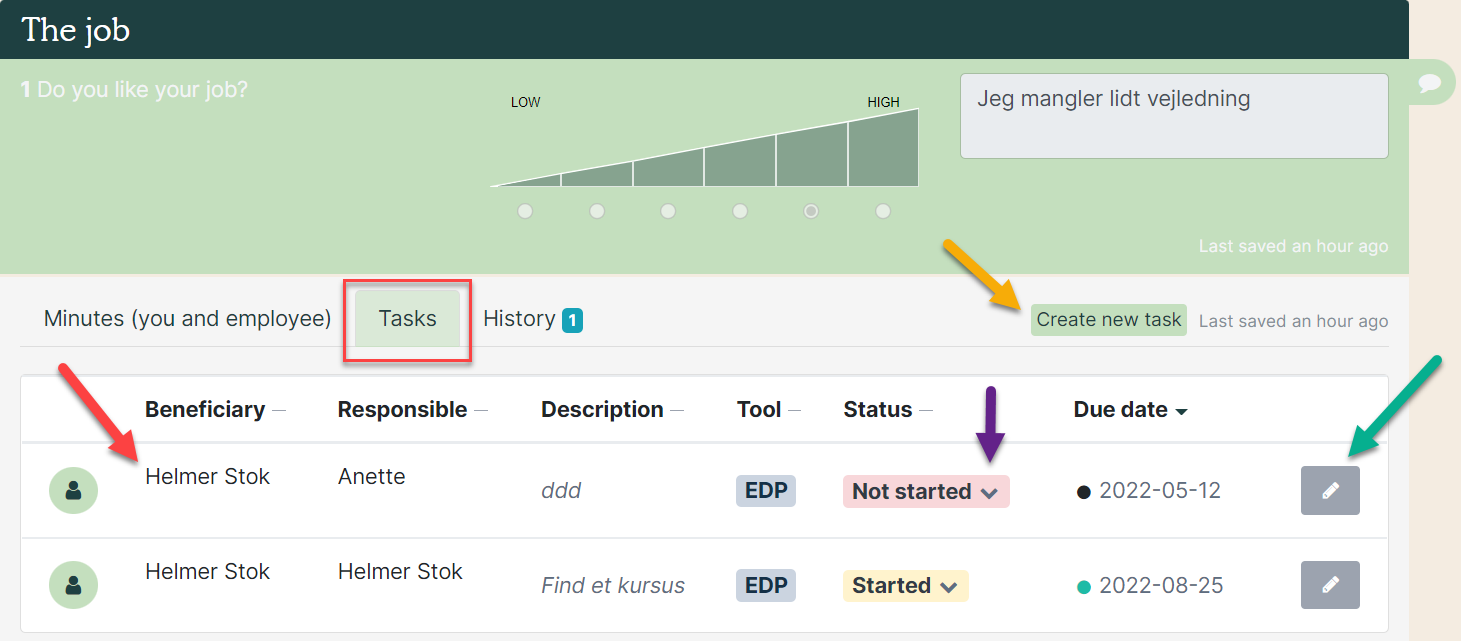
5. You can also create tasks. Go to the tab ”Tasks” with the following options:
- Red arrow: This is all the tasks created for the employee to this specific question. If there are tasks from e.g. last years EDP, they will be visible here. When you create a new task, they will be visible immediately.
- Yellow arrow: Create a new task. By deadline, reminders are sent per. mail to the responsible for the task.
- Green arrow: Edit tasks. See manual on how to edit tasks.
- Purple arrow: Change status of the task here.
6. If your organization has made lists of initiatives or courses (see the guide ‘Competence initiatives - setup’), a white box will appear at the bottom of the minutes. Here, the employee has wanted some courses based on a set list. During the dialogue, you agree on which courses / initiatives the employee can participate in, after which you approve them in the minutes (red arrow). Note that there may be several lists (yellow arrow).

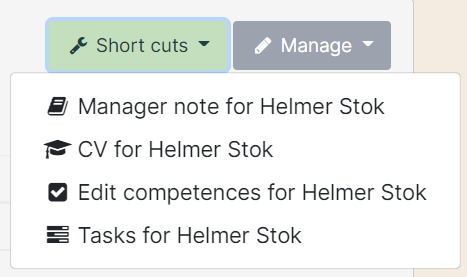
7. When you are in the minutes, you can choose to retrieve the employee's other information. Click on 'Short cuts' at the top of the screen and select one of the tabs:
- Managers notes
- Employee CV
- Edit competneces
- Tasks
8. The minutes are saves automatically. Click on 'Close and send the answers' at the buttom to close the minute.

9. In the completed minutes, you can quickly get an overview of comments and tasks. The speech bubbles get darker when you have written something or created a task.
Even if the minutes are saved, it is still possible to write in the minutes. You simply open the form, make your additions and save it again at the bottom. Once the form is completed, it is not possible to change the text in the minutes. However, you can always write an addition to the existing minutes.

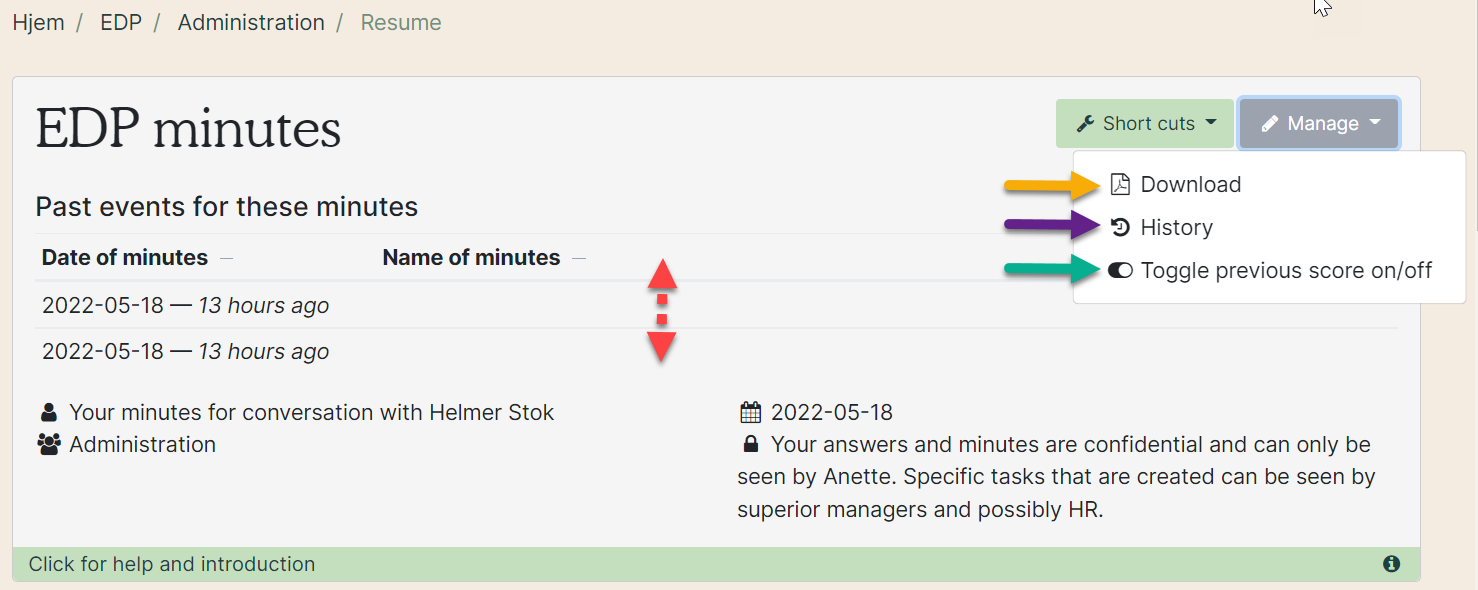
10. In the menu at the very top of the minute, you can see when you have made additions to the minutes. Click on menu and select ‘History’ (purple arrow). It is also up in the menu, you can download the form (yellow arrow) or add previous score to the form so you can compare (green arrow).
