Use Evovia to facilitate the dialogue about sickness absence
All employees created in Evovia can report illness to a colleague but cannot see the dialogue. It is also not possible to write anything about the reason for the sick leave. It is the manager - or the employee to whom the manager has given access to this - who from his access enters the Sickness Absence tool and conducts the sickness absence dialogues and writes minutes.
See more
- Reporting a sick leave
- Overview of employees on sick leave
- The sickness absence dialogue
- Report the employee fit for duty
- Archive
1. Reporting a sick leave
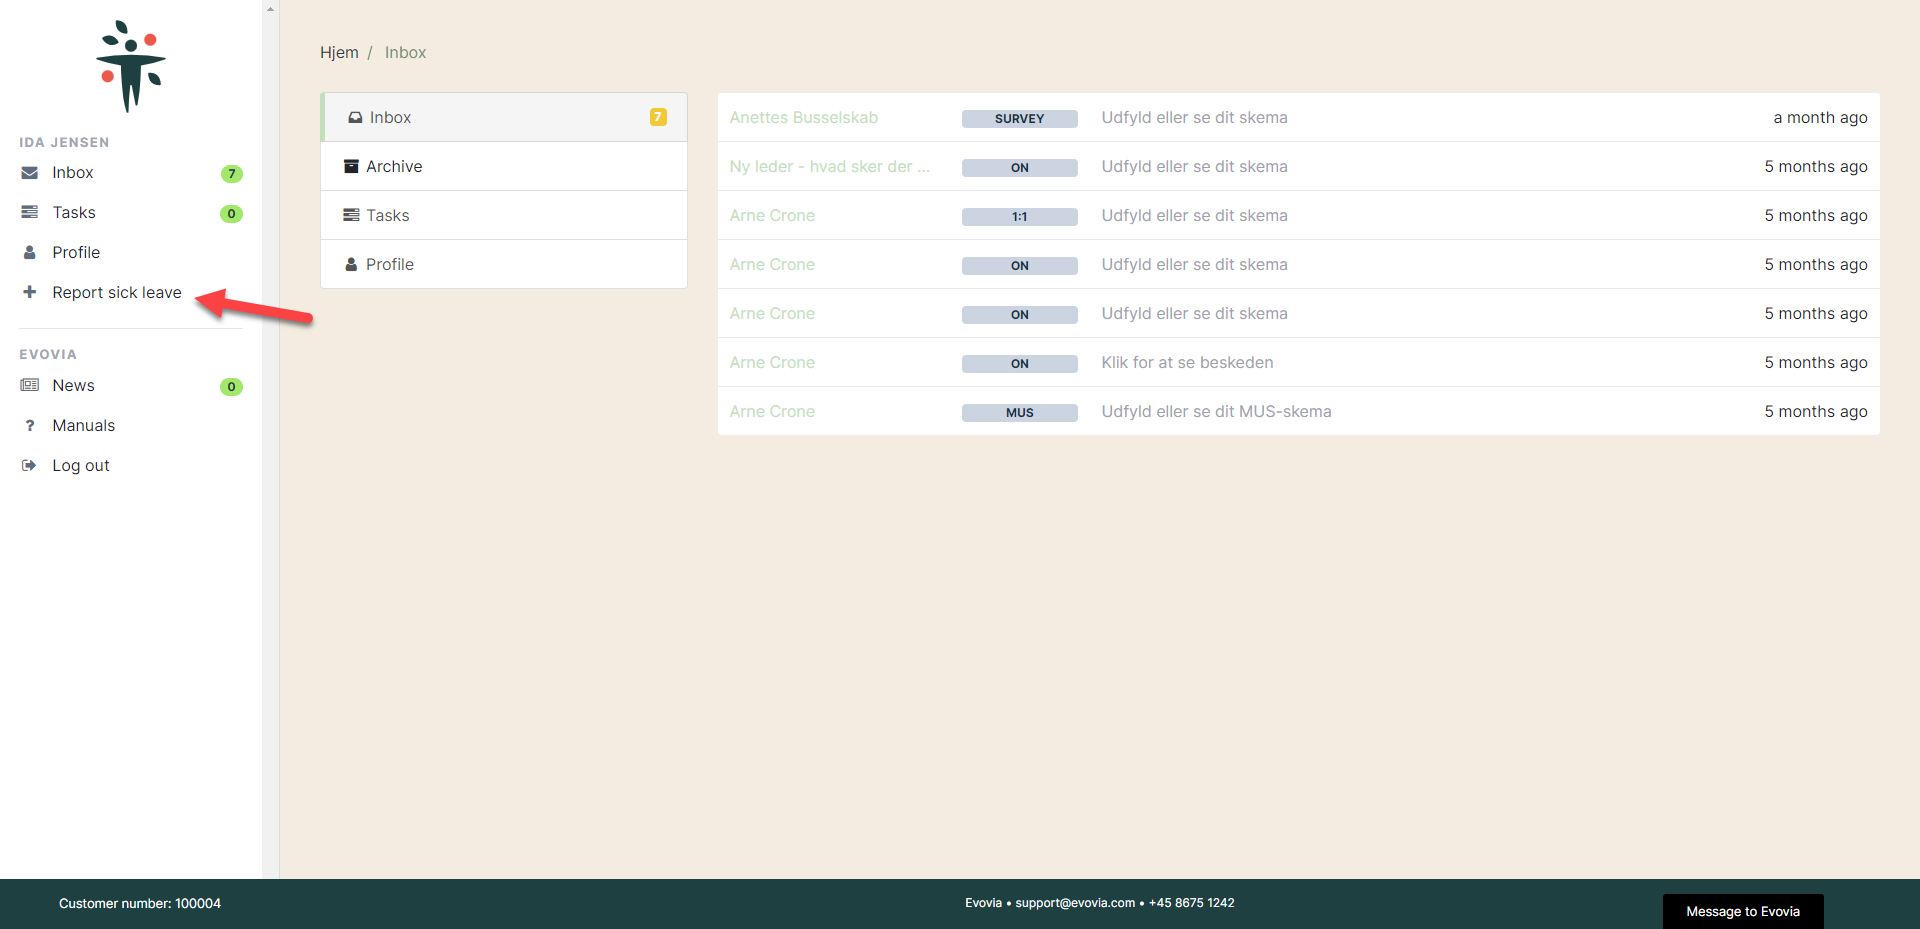
Start new sick leave by clicking on 'Report sick leave (red arrow) in the left sidebar.
2. Select employee and date
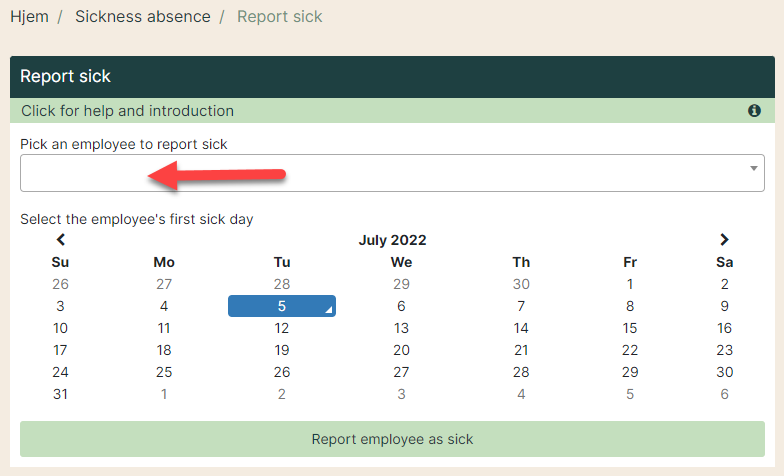
Write the employee's name (red arrow), select the date of the first sick day and finish by clicking on 'Report employee as sick'.
3. Overview of employees on sick leave
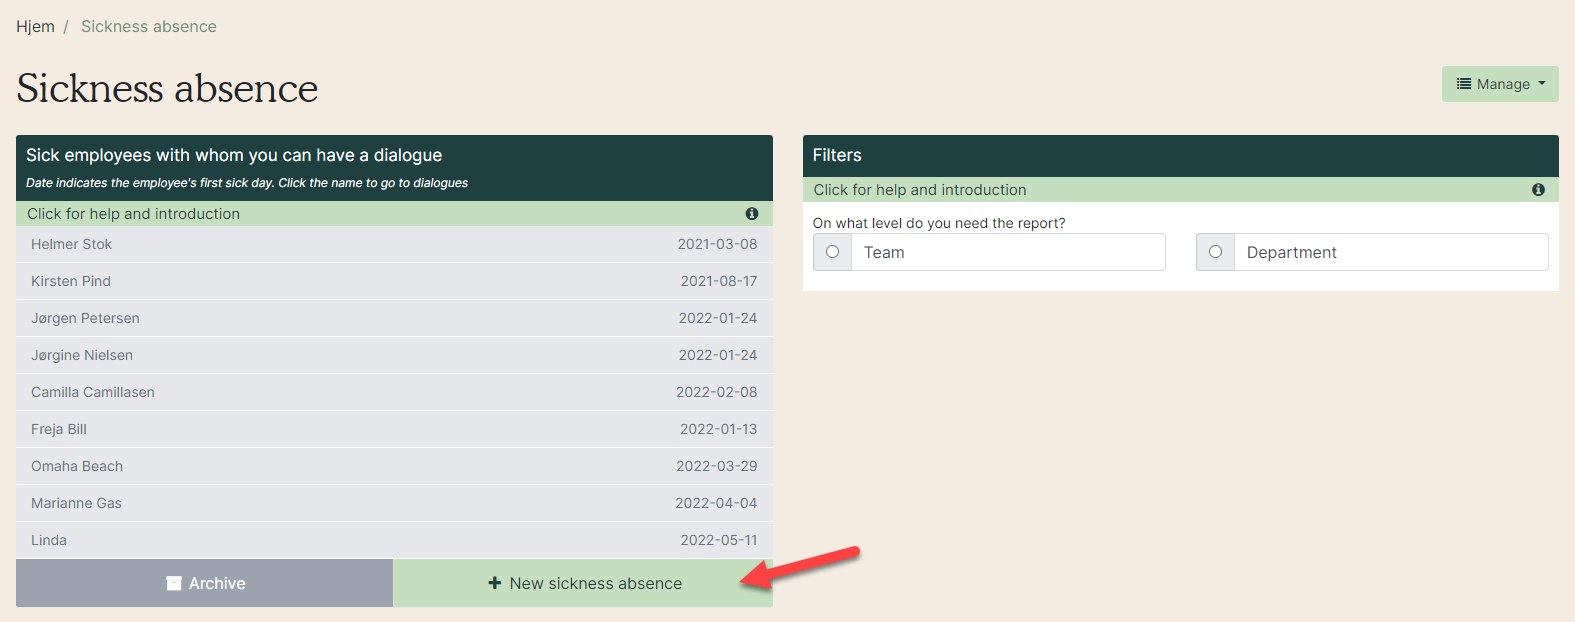
You can see sick notices among your employees. Here you also have the opportunity to report an employee sick (red arrow). In the box to the left, you see the employees who are currently on sick leave.
4. The sickness absence dialogue
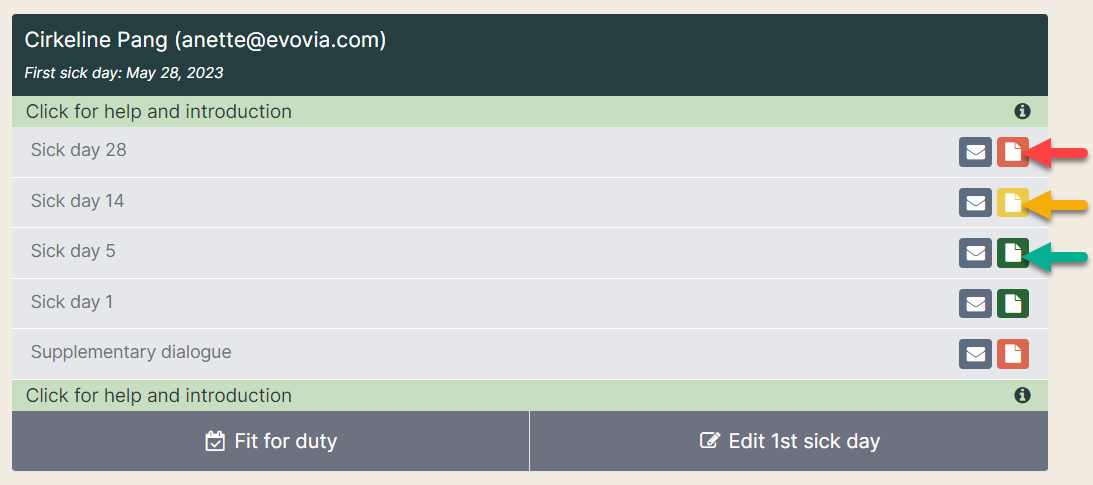
Click on one of your employees (red arrow) to go to the dialogue. Here you see all the questionnaires that can be used (dotted red arrow).
You can do the following:
- Open the questionnaire by clicking the paper icon (green arrow).
- You can if necessary send the agenda to the employee by clicking on the envelope (yellow arrow).
-
See employees who were recently sick within the last 7 days (purple arrow).

Depending on how you have set up the sickness absence tool in your organization, a new questionnaire will appear, which can be used on the set sick days.
See more in the manual “Setting up the sick absence”.
Our standard sickness absence dialogues:
- Supplementary dialogue (available on the day the sick leave starts)
- 1st sick day
- 5th sick day
- 10th sick day
- 14th sick day
- 28th sick day
E-mails to the manager:
The manager receives an e-mail when it is time for a sickness absence dialogue, e.g. in the 5th. Sick day. To not disturb the sick employee unnecessary, an e-mail will only be sent to them when the manager has sent the minute.
See the e-mails you receive as a manager
See the e-mails sent to the employee
Status of the questionnaires:
- Red: Not opened.
- Yellow: Opened, but not sent.
- Green: Finished and minute sent to the employee.
5. Send the agenda
Send the agende to the employee on sick leave.
- Yellow arrow: Select the dialogue.
- Green arrow: Write a message, e.g. time for the meeting
- Red arrow: See the mail before it is sent.
- Purple arrow: Send the agenda to the employee.

See the manual ”Send the agenda to an employee on sick leave” for more information
6. Minutes
The questionnaires contain all the questions to ask the employee.
Click on the speech bubble next to each question to write your minutes for the conversation (red arrow). Write comments in the white text field (green arrow). The questionnaire is saved automatically, and you can see when it was last saved (yellow arrow). Previous minutes from the dialogue is under ”History” (purple arrow)”.

7. Tasks
You can also create tasks.
You can write a task description, select priority and set a deadline (deadline ensures that the manager and employee receive reminders by e-mail).
Go to the tab “Tasks” with the following options:
- Red arrow: All the tasks created for the employee on this questions are here. A new task will also appear here.
- Yellow arrow: Create a new task by filling out the fields. By the deadline, an e-mail is sent to the responsible for the task.
- Green arrow: Edit task. See the manual ”Edit, close and chat about tasks".
- Purple arrow: Change status of the task.

8. Finish the questionnaire
The system automatically saves during the dialogue (see point 6). To finish the minute click on 'Close and send the answers' at the bottom of the minutes.

The employee receives an e-mail that the minute is ready. See the e-mail HERE.
9. Report the employee fit for duty
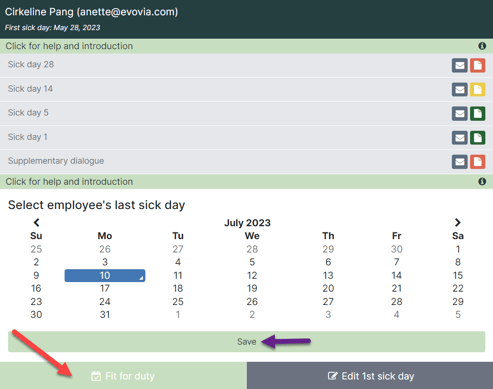
You can report the employee fit for duty by clicking on their name. The overview of dialogues appear on the right side for you to click on “Report fit for duty” (red arrow) and the tab unfolds. Select a date and click on “Save” (purple arrow).
10. Change the first sick day
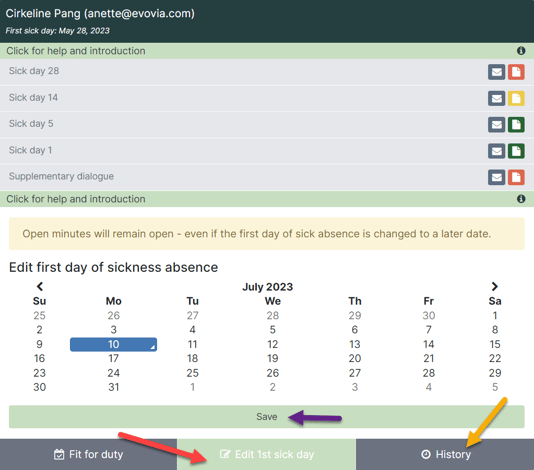
If you have selected the wrong date for the first sick day, you can also change it.
Click on ”Edit 1st sick day” (red arrow), so the box unfolds. Select the right date and click on ”Save” (purple arrow).
You can see previous sick leaves on the employee under the tab “History” (yellow arrow).
11. Archive
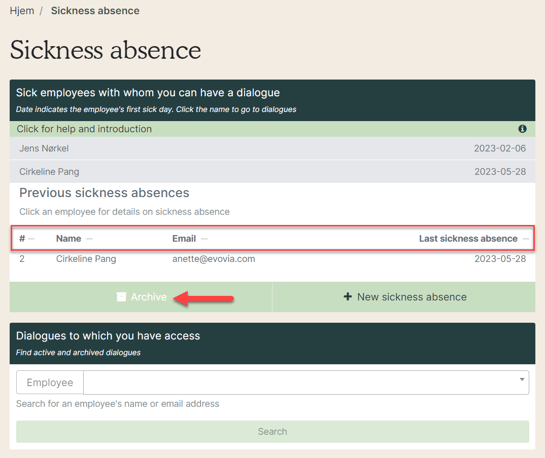
Click on ”Archive” to see all previous sick leaves.
Sort by clicking on one of the headlines.
12. Open an archived dialogue
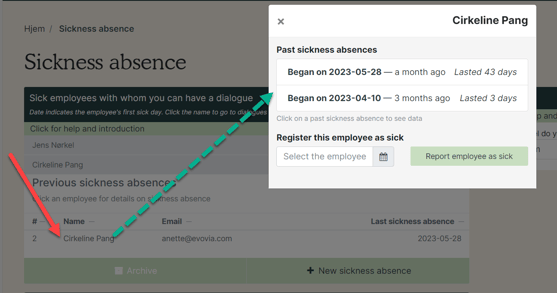
Click on an employee (red arrow) to see all their sick absences.
Click on a sick leave to go to the archived dialogue (dotted green arrow).
You can download all the sickleave absences.
See how in the manual ”Download sickleave minutes”.
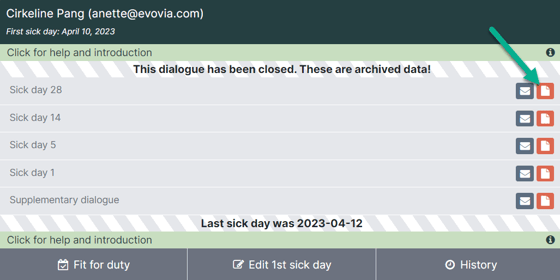
13. Add information to an archived dialogue
You can still write in an archived dialogue (green arrow).
See more on the manual ”Statistics for the sickness absence process”.